
In this step, you will be able to provide all input for the campaign. When you completed all steps one of our account managers will review the campaign, before putting it live. In order to make this review process go as smooth as possible, please provide us with as much info as possible.
To add a campaign, go to Sites (My account) or to campaign overview.
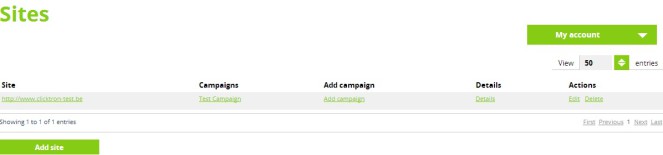
Select Add campaign.
There are 3 steps when setting up a campaign:
- Mandatory fields
- Creatives
- Additional information
Step 1 - Mandatory fields all fields are obligatory
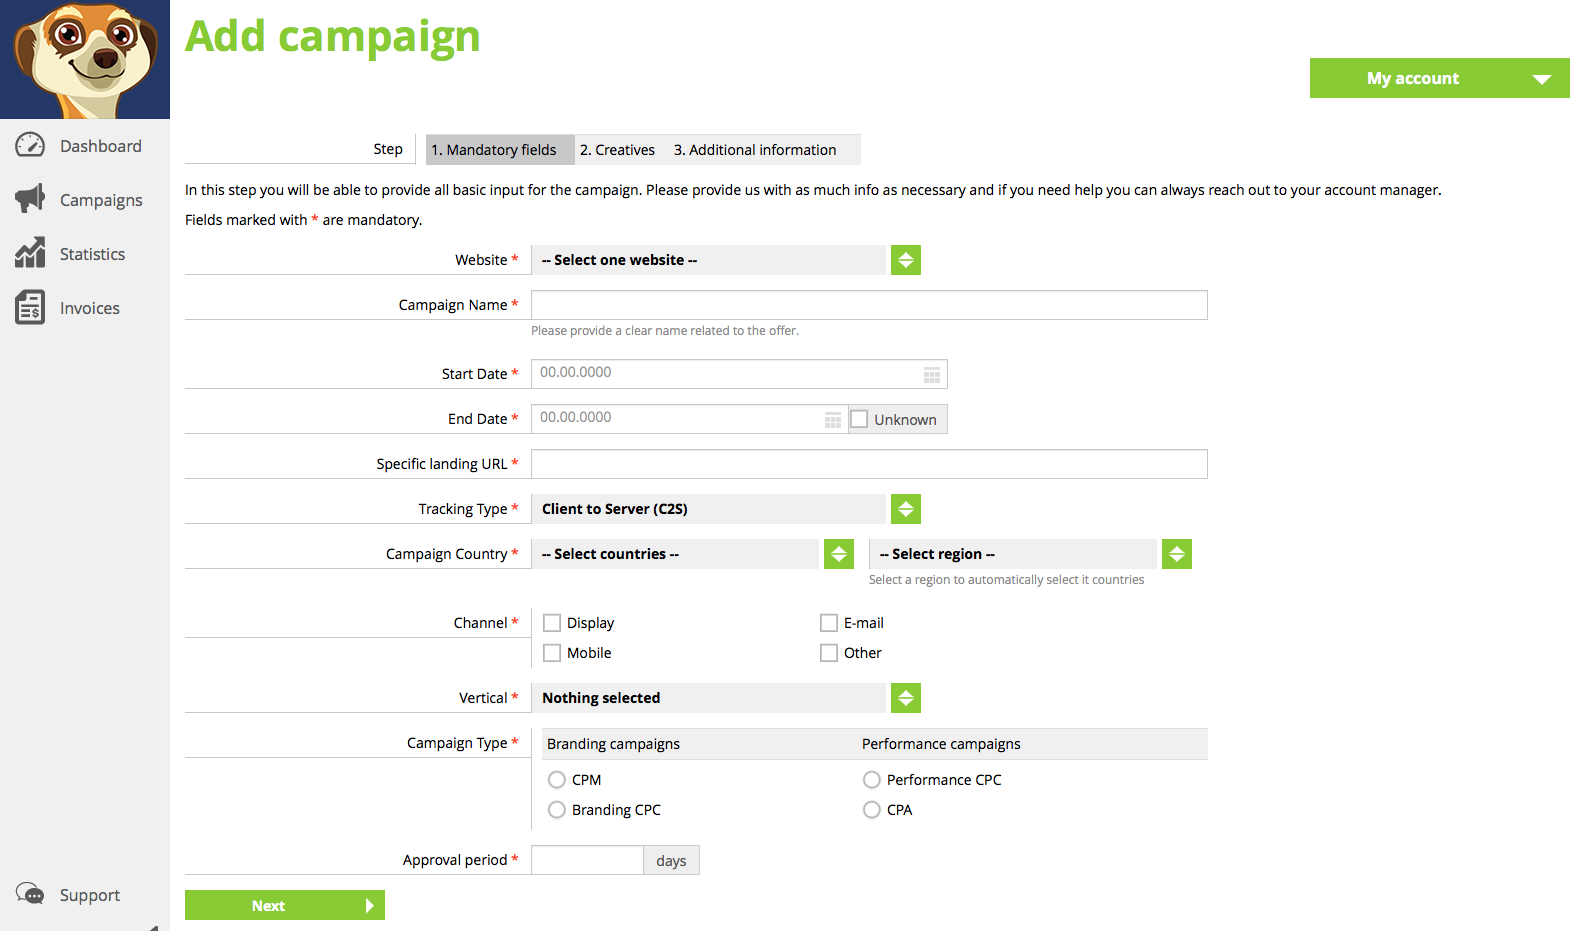
1. Select your Website and determine your Campaign Name. Please provide a clear name related to the offer.
2. Select Start Date and End Date (select Unknown if not yet determined).
3. Indicate Specific landing URL.
4. Select Tracking Type: Client to Server (C2S) or Server to Server (S2S).
5. Select Campaign Country. It is possible to select multiple countries and languages by selecting a Region.
6. Select the right Channel.
- Do you want to advertise your website through banners? Select Display.
- Do you want to set up an e-mail campaign? Select E-mail.
- Do you have ads for mobile sites? Select Mobile.
- For anything else? Select Other.
7. Select one or more Vertical
8. Select Campaign Type.
8a. in case you select CPA campaigns, select the Campaign subtype
9. Select the Price for the campaign
10. Select the Approval period
Optional: In case of a CPA campaign you will also need to indicate the Conversion point
In step 2 - Creatives

In this step you can upload all creatives related to a campaign. It is important to upload all available creatives as this improves the results we can deliver.
We are able divide the creative in different Categories, which allows targeting specific publishers.
Furthermore you can indicate if banners are Downloadable or not.
Last you can add specific Clicktrough URL‘s per banner, if you want to track specific performance per banner.
In step 3 - Additional information
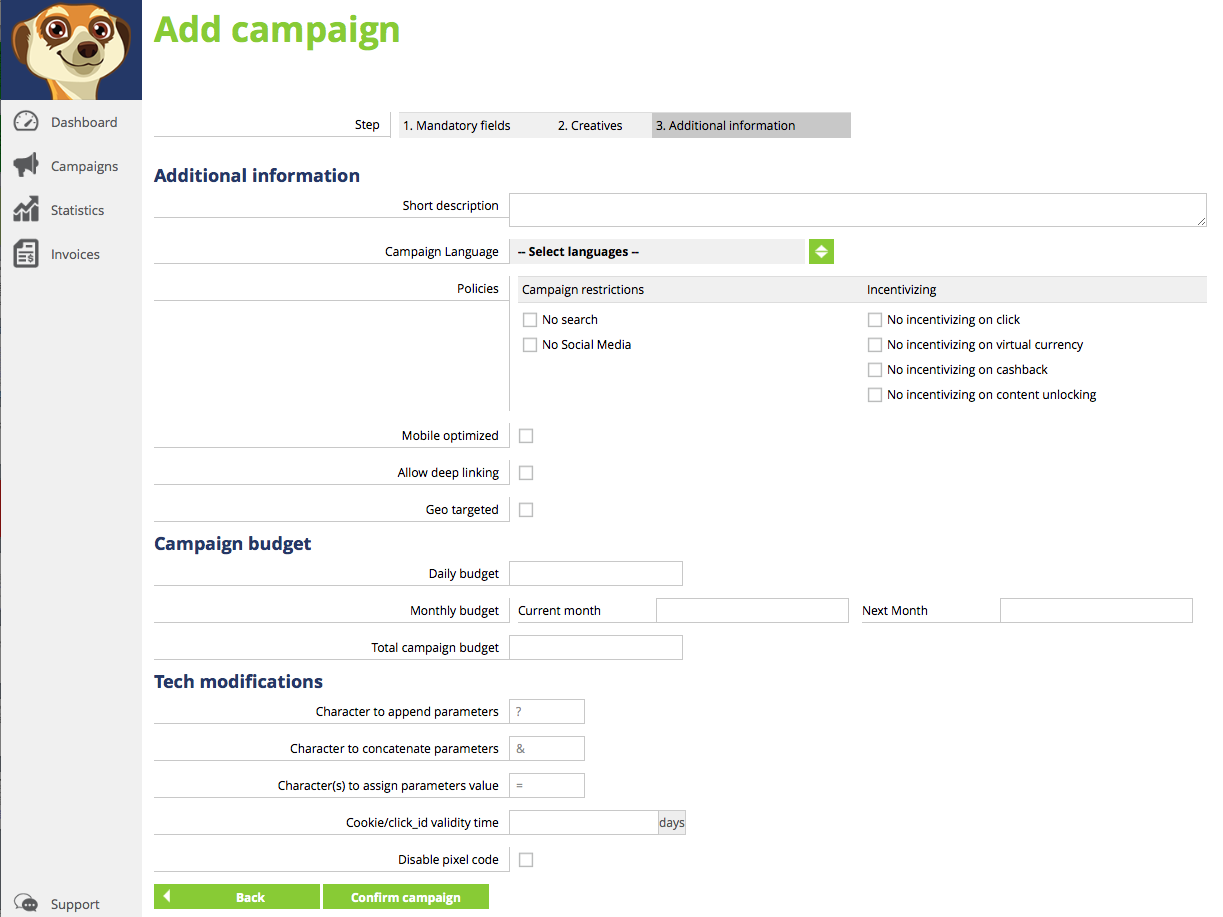
1. Indicate a short description that describes the campaign.
2 Select Campaign Language
3. Select Campaign Policies
4. Select if the campaign is mobile optimized
5. Select if deeplinking is allowed
6. Select if the campaign is GEO targeted
Campaign budget - here you have to indicate the amount of actions/clicks per time period. Watch out that this is not the monetary amount, but the amount of actions or clicks - do not put anything if budget is unlimited:
- Indicate Daily budget
- Indicate Monthly budget and budget for next month
- Indicate Total Budget
7. Define Character to append parameters.
8. Define Character to concatenate parameters.
9. Define Character to assign parameters vaule
10. Define the Cookie Time
11. Indicate if the pixel code should be disabled - only applicable if you do not want to track the results of a campaign anymore
After filling out these details, click on confirm and the account manager will review your campaigns as soon as possible.